
Vditor 如何离线使用?
前言
Vditor 是一款所见即所得的浏览器端 Markdown 编辑器。
个人使用它有两个原因:
- 相比于同类型的,确实很好看,之前用过一段时间 Typora ,收费之后就没用了,效果上很类似(所见即所得)
- Markdown 引擎是开源的 lute ,当我需要一个前后端相同渲染效果的引擎时,它就很不错了
基本使用就不多说了,文档很详细,功能也很全面,看看就知道了,本文是由于再离线环境下使用的过程中发现 Vditor 需要依赖外部 CDN 资源,所以踩了一些坑。
基本步骤
网络上有 Vditor 的 CDN 但无法直接拿来用,除非你是原生 HTML。如果你直接配置网络的地址到 CDN 的配置会发现路径多了一个 dist。当然,官方也支持自建 CDN,将源码放到 nginx 里面去也可以,但这样单独部署很麻烦。我还是希望打包到一起去。其实作者在 issue 里面已经说了,挺容易理解的,过程也就基本是这样。
修改配置
1 | import Vditor from 'vditor'; |
复制 dist
将 node_modules/vditor/dist 复制到你需要部署的服务的文件夹中,比如,我这里用的是 vite 所以就是 public 文件夹下理论上和 index.html 是同级的。
优化
如果此时默认这样服务的话,加载 js 会很大,大概 3.8M+,肯定不行,会明显卡顿一下,所以需要压缩。我这里使用的是 BR,当然你也可以使用 gzip。具体如何压缩就看看你部署的工具是什么了。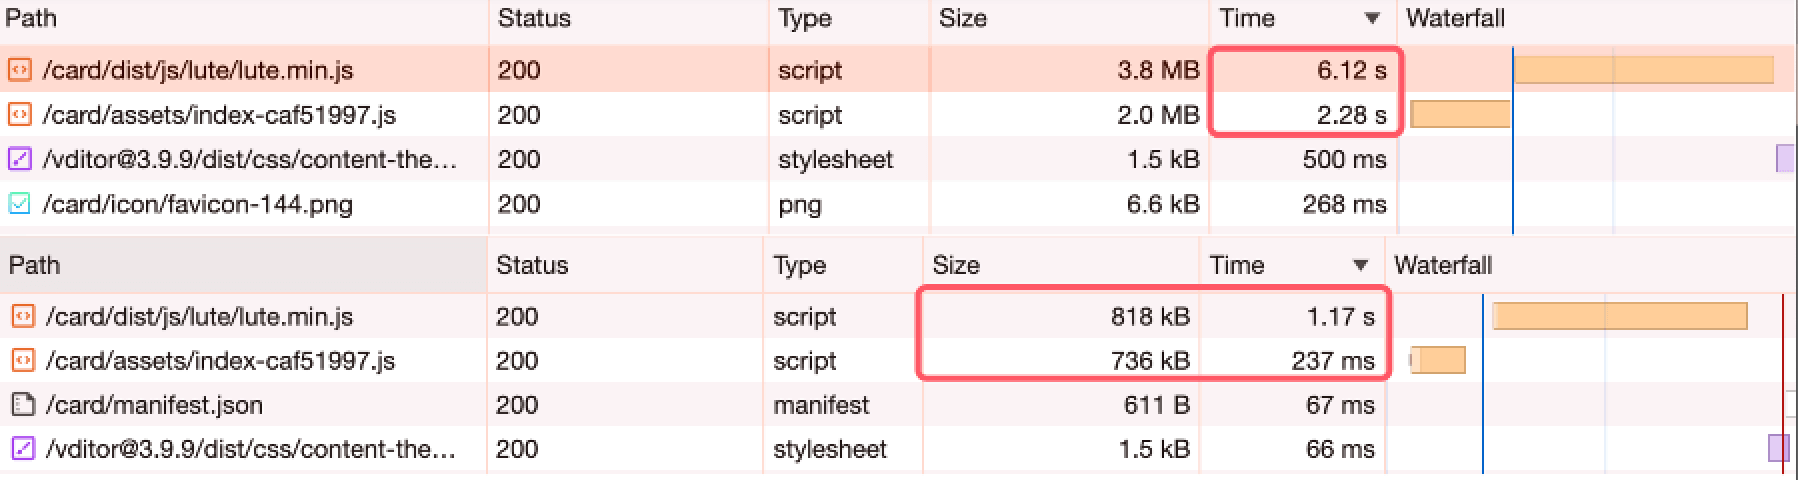
这样之后,你就会发现打包之后你的文件大小特别大,因为源码也在里面了,所以我删除了所有 dist 中不需要的组件源码,比如流程图渲染等等,这样可以减少打包后的文件大小。
总结
总的来说,使用体验还是很不错的,后面还会继续使用。
本博客所有文章除特别声明外,均采用 CC BY-NC-SA 4.0 许可协议。转载请注明来源 LinkinStar's Blog!
 微信
微信 支付宝
支付宝
评论